Wednesday, August 31, 2011

Stencil.... Yet Again!

I wanted to finish grouting the tile, and install the faceplates, but Drew has had some crazy busy work week... And the stencil just turned out too awesome to hold out on you!


This first picture shows how subtle the paint looks... The other pictures are taken from angles that emphasize the gloss and matte...


We love it... We just stand in the bathroom and admire it! Patting our own backs, and self high fiving!


Tuesday, August 30, 2011

Stencil 2

Stencils Continued...

This is where a little bit of magic happened.... Drew took over... I am not one for details and patients when it comes to projects... In fact just tonight I spray painted a round mirror.... I got one strip of tape on it and said forget it.... Why else did they invent goof off?!

I will say that i did paint the walls in the bathroom first, point me! Again, I chose Sherwin Williams, light french grey... We chose a satin, and gloss finish of the same color... We painted on the gloss first, and then when we painted the stencil we did the satin which is a flatter sheen... So Drewpy took the reins... Found the center of the wall, and placed the new stencil paper over it...

The stencil paper is more of a plastic, so it doesn't warp when wet with paint, and clear so you can trace easily...

We used a high density foam roller, we kept an old pillowcase next to the tray. After you get paint on the roller, we rolled it on the pillow case so that the roller had minimal paint on it...

Too much paint on the roller and you would get paint runs, underneath the stencil...

Drew did super light strokes, multiple times... We ended up going back through and painting two coats...

Drew just pushed the stencil in the corner and rolled it... I kept telling him to wait until the end and cut it so it fit in the corner easier, but this seemed to work for him...


This is in the middle of the second coat of stencil...


A sneak peak of the stencil drying....


It is so nice to have a busier pattern, toned way down because the color is the same, but just a hint of gloss....
Final pictures hopefully soon!


Monday, August 29, 2011

Stencil

So I decided to try my hand at wall stencils... Love the look, don't love the price... $60 for a stencil.... However let me just say, that after I started in on my DIY wall stencil, I now understand the price, and might invest in one.

laylagrace.com

I found this pillow, and loved the pattern, I liked that there are two shapes in one.

So I saved the picture on my iPad. Used my app, ArtRage, enlarged the pillow, and snapped a screen shot of the pillow pattern...

Then I measured my walls, there is not a lot of room in between my crown moulding and marble tile wainscot. Which will hopefully make for and easier painty job.

After measuring the wall, I picked the scale I wanted for the design, and sized the picture to what I needed.... Then came the super sophisticated iPad way of tracing.... I slapped my piece of paper on top of my screen and traced it.... Oh to have an HP Wireless printer.... All of these champagne problems...

The real problem was I was nervous that I didn't trace it exactly even, or that the image because it came from a pillow would be slightly skewed, which would end up throwing off the whole wall... So I measured one "corner" of the stencil, and then traced it four times.... Flipping it over and turning it upside down to get perfect proportion.

I then took that tracing and made a few more cut outs to see if my proportion was on.... It was...

Then I bought a cardboard box from Home Depot, for $1... I wanted something thick, so the paint wouldn't warp it, but something I could cut through with an exacto knife...

This is where I turned it over to Drew.... My brain doesn't work the way his does.... He's a gosh darn genius... He squared up the cardboard using the 1,3,5 method.... Whaaaaaaa? Then measured my stencil, and spaced them out evenly and traced them all for me... I got out the exacto knife and cut out his tracing...


Well I'll give you a spoiler alert... Cardboard was crap.... Too thick, and we would have had to press the roller too hard to get the foam roller to get it to paint the wall... So we made a trip to the Hobby Lobby to buy some stencil paper....
Part deux.... To... Be.... Continued....


Friday, August 26, 2011

Instagram Week

This week I watched a three year old beam with pride as she rode her bike all the way to the park... I beamed a little too...

I love my job...

While vigorously a knife, I ended up jamming it into my hand, in-between my thumb and pointer finger... In hung in there for a second while I talked myself into not fainting... Pulled it off, and tried to swear off doing dishes forever...

Come to find out we are I'll prepared for bodily injuries... I found a t-shirt and painters tape for a bandage... Not the best...


Drew helped me make a wall stencil... Walls are primed and ready... Hopefully to be finished this weekend...


On a trip to Home Depot we spotted a free couch.... Which I believe to be perfect for our home office.... Drew insists it smells like urine..... Drama Queen!


Have a happy weekend!


Thursday, August 25, 2011

Drew's Paneled Wall

Drew did a finish trim job that I just had to share...
Boring, plain beige wall, no trim around windows... Boring, boring, boring.... I'll tell you what wasn't boring, was the owners, houndstooth, tufted headboard... I had no idea the houndstooth would translate so well onto a tufted piece... Now to make the wall match the headboard.
Drew had a shelf from another room, made out of a super expensive wood that the client wanted the wall to look like. Drew took less expensive wood, and stained it to match.... Plank by plank....
Drew's staining method is precise, and always turns out beautiful and not blotchy.
1. Start with Minwax Pre-conditioner... This helps the wood absorb stain at the same rate... This is key to avoid blotches.
2.  Use cheese cloth rags to dip in and rub the stain on.  Drew uses minwax stains, that are found at Home Depot.  Always rub the stain on in the direction of the grain.
3. Let it sit...
4.  Wipe of excess...
5. Apply second coat of Minwax stain.. I believed he used Walnut on this wood.
6. When the wood is the color you want, wipe off excess and let dry.
7. Then using sponge brush apply a clear coat.  Drew also used Minwax's Polycrylic sealer.
8. After clear coat dries according to instructions take a fine grit sandpaper and knock down the sealer...
9.  Don't worry about wiping between coats of sanding and sealing... It all gets absorbed. 
10. Final coat of sealer... and done.
To install...
1. Drew started at the base of the wall and marked some level marks with a chalk box and a level.  This helps keep the boards straight... After the first few, they sit on top of each other so there isn't too much room for error.
2.  Then he shot on the boards with his Ridgid Nail gun, shooting 16" on center as much as possible because that's where the studs are in the wall..
3. When he got to the windows this is where it got tricky, he measured the distance and cut the planks to size, then mitered the ends on 45 degrees and returned them into the window with short cuts also one side cut on a 45 degree mitre.
4. Repeat, Repeat, Repeat...

And Bam! The big reveal! I should have given you a little bit more warning it was coming.... It's dangerous to thrust that much beauty on a person all at once.... Smiley face!
But seriously.... Come on, isn't it incredible? Yes... Yes it is!

Any home improvement needs? Call Drew...
801.244.8790


Wednesday, August 24, 2011

Repurposed Entertainment Center Turned Vanity

Drew had an old entertainment center he was hauling away from a job he did. The entertainment center was super long and had two glass doors.

We dismantled the entertainment center, which came apart easily into two cabinets.

We cut the top down to size...

The only tricky part was getting the edge detail match all the way around. So we cut the edge off of the scrap piece we weren't using, and glued it onto the edge.

We bought 4 legs from Home Depot, for a few dollars each.

Painted everything, with Martha Stewarts paint line, zinc.... Perfect grey.


We still have some knots to fill, and paint touch ups... I am thinking about painting the inside of the glass grey, I love the look of the underside of glass painted... Gives it a nice depth.


Now to build our sink and the vanity is complete!


Tuesday, August 23, 2011

Gold Bird Branch Mobile

For a high school/sorority friends shower I decided to make a felted mobile... It started with cutting a branch from our Aspen tree.

Plucked the leaves from the branch...

Lightly, lightly sanded the branch, and cleaned it off. And sprayed it gold with Rustoleum's metallic gold, spray paint.

Then sealed it with modge podge's spray sealer.


I then tied my birds and clouds that I felted to the branches with fishing wire. I stacked the branches on top if each other to give it a little dimension.


I love how it turned out... Now just to get it to my friend!


Monday, August 22, 2011

Bathroom

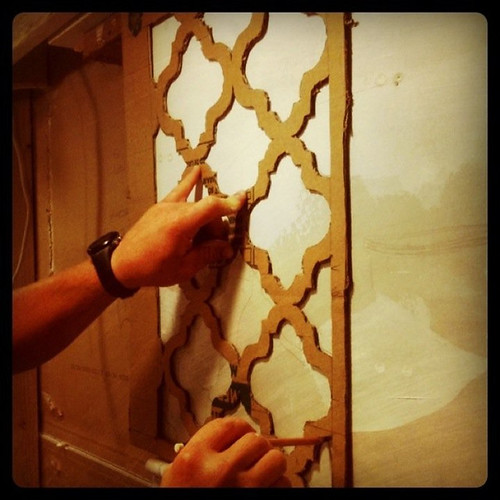
We are nearing the finish line.... Last week we finished the tile room.... Or bathroom.... There is SOOOOOOO much tile! If you follow me on instagram, you have seen more of the day to day process of tile.... I love that little visual journal!

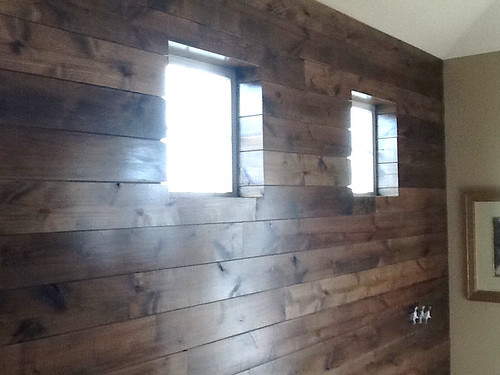
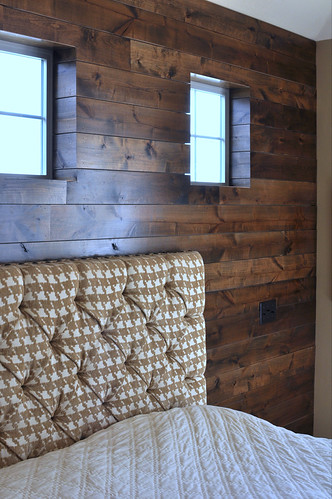
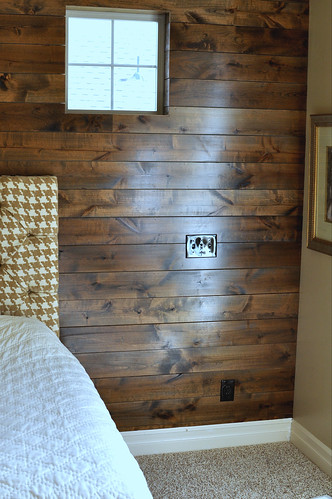
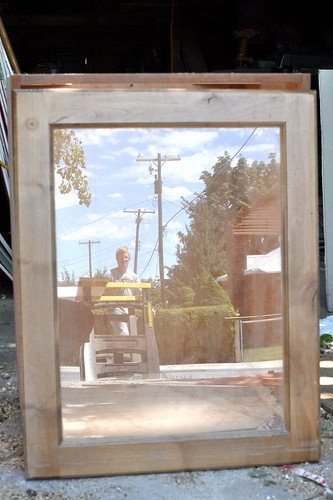
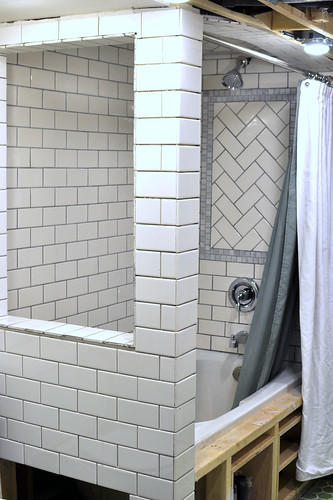
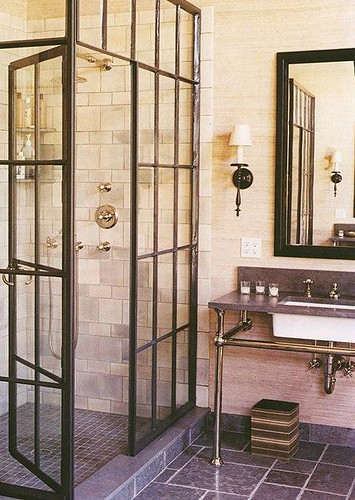
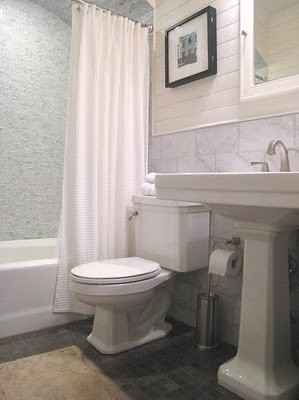
The first detail I want to point out is the "window" opening on the end of the shower. I designed this for several reasons, the first is, we have so much detailed tile in the bathroom, I want to have multiple angles to view it. Our bathroom is small and having a window opens up the view when you first walk in. It also allows light to enter the shower which would always be dimly lit otherwise. And lastly I fell in love with the photo below of the industrial style shower stall, so by adding this window feature it will allow me a space to put in a paned window in our bathroom... Function and style.

(remodelista.com)

Imagine those panes in that space.... Perfect!

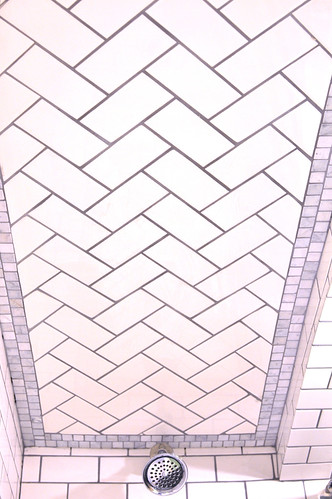
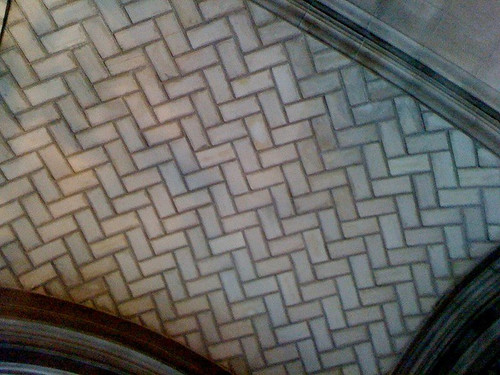
This herringbone was a major headache! But it was worth it! Then we designed the mosaic marble tile to accent the herringbone tile, but I wanted each layer of the marble mosaic tile offset to add a little more aesthetic dimension to the design.

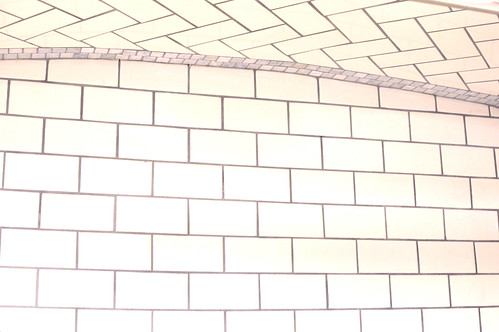
The ceiling.... Oh the ceiling... I love it... The bathroom because we are in the basement has some plumbing from the upstairs that causes the ceilings to be lower in some spots... However we placed the tub where there were no pipes or vents, so we were able to make the ceiling higher when we stepped into the tub. To add a little extra pizazz we arched the ceiling.... And then to pizazz the pizazz we herringboned the arch. Tile PALOOZA!

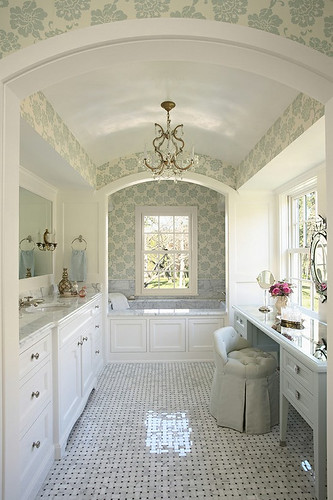
After I have a design in my mind, I start research to see if others have been able to create the look I want. The photo below had the arched ceiling I wanted and my marble tile wainscot... This gave me the reassurance to go for it...

(newlyweddiaries.com)

Below is something I stumbled upon while studying tile design. I fell in love with the curved herringbone. This is one of those inspiration pictures, that is fun to look back on when you realize you recreated it.

(pink-to-green.blogspot.com

Another curved ceiling... What I really liked about this tile is how they staggered the square tile with the rectangle to give it a shingled look... People are so creative.

(simplyseleta.com)

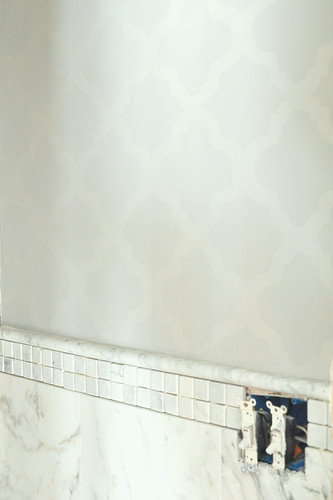
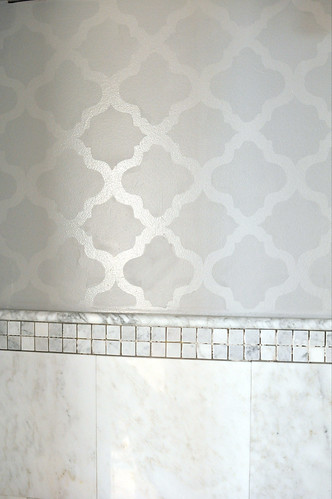
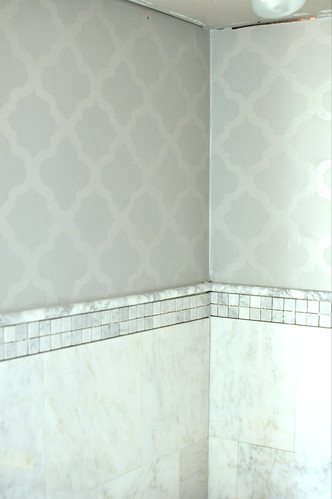
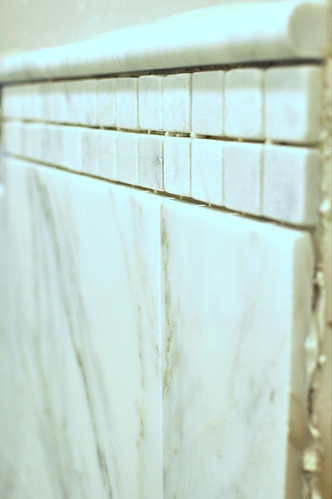
We have our marble wainscot trimmed out with two layers of mosaic tile, topped off by a bullnose rounded tile to give it a nice finished line.

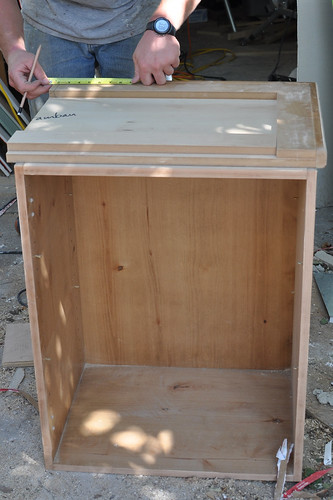
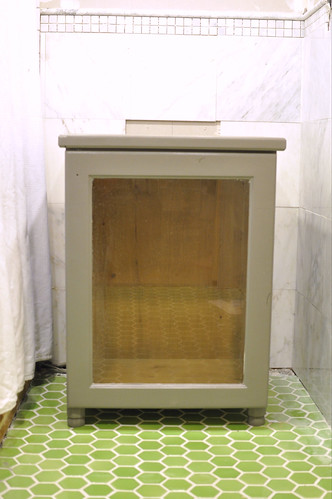
And our tub storage... It is my belief that we don't need massive houses, we just need to use our space better. I would rather have a small home, done well to the last detail.... Then an oversized home, mass produced with cheap finish work. By adding storage in commonly wasted space, we are able to live more comfortably in a small space, and be able to afford marble wainscot!

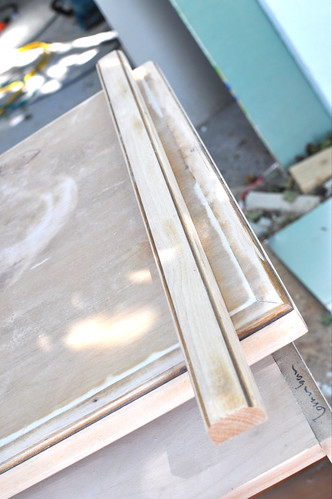
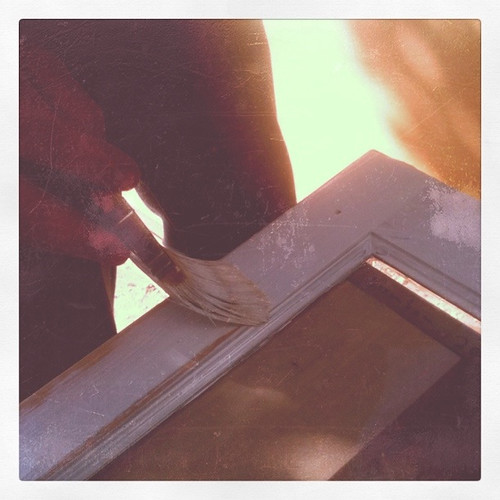
The tub below has square panels on the side, this Is what the doors will look like that cover our tub storage.

(houseofturquoise.com)

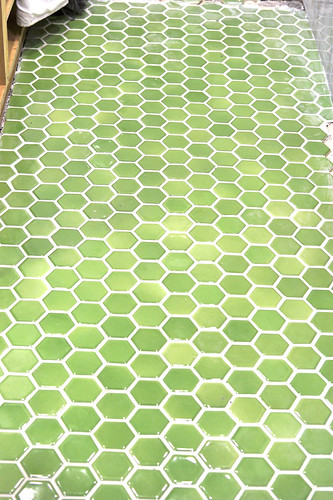
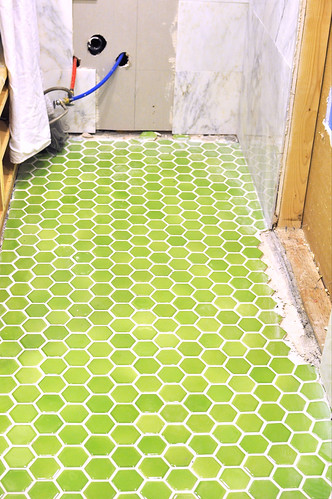
And our green tile...... I love, love, love it! But oh boy, laying each tile on by one, was quite a job... And can you see how amazing Drew is.... Those grout lines are near perfect.... Okay, let's just call them perfect... (Need a tile guy? Hhmm? You know who to call... 801.244.8790) I love the mix of shades in this tile.

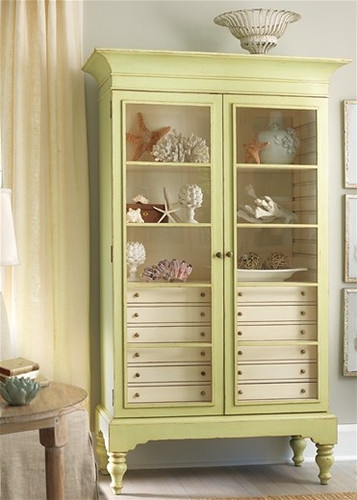
In the picture above you can see on the right a space cut out of the wall, that is where Drew is building a hutch like the one below that will sit inside the framed two by fours. By setting it in the wall, and having a little built out we are able to get 8" of storage space, while only taking up four inches of room space...

(laylagrace.com)

And isn't it lovely?!

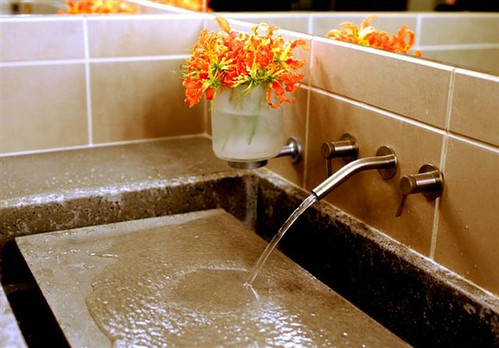
And this is the sink we are going to make, form it out of melamine, and poor it out of concrete.... I really like this design, first because it's different, I have never seen it anywhere, and second because when the water is off it adds more table space while getting ready. And that is our tile room....