


My teepee is different than Smile and Waves because I wanted mine to be collapsible.... It's hard to store something that is 7 feet tall.... Mine breaks down and folds down to 4 feet... I know that collapsible is a big selling item because my Collapsible A-Frame Pup tents have been a huge source of traffic to my blog!
So here goes nothin'....
Shopping List:
* 1 9x12 drop cloth.... If you can find a way to get it all in... I'm not sure if there is a larger scale drop cloth or just get the 9x12 and a smaller one for the door... Or different fabric for the door...
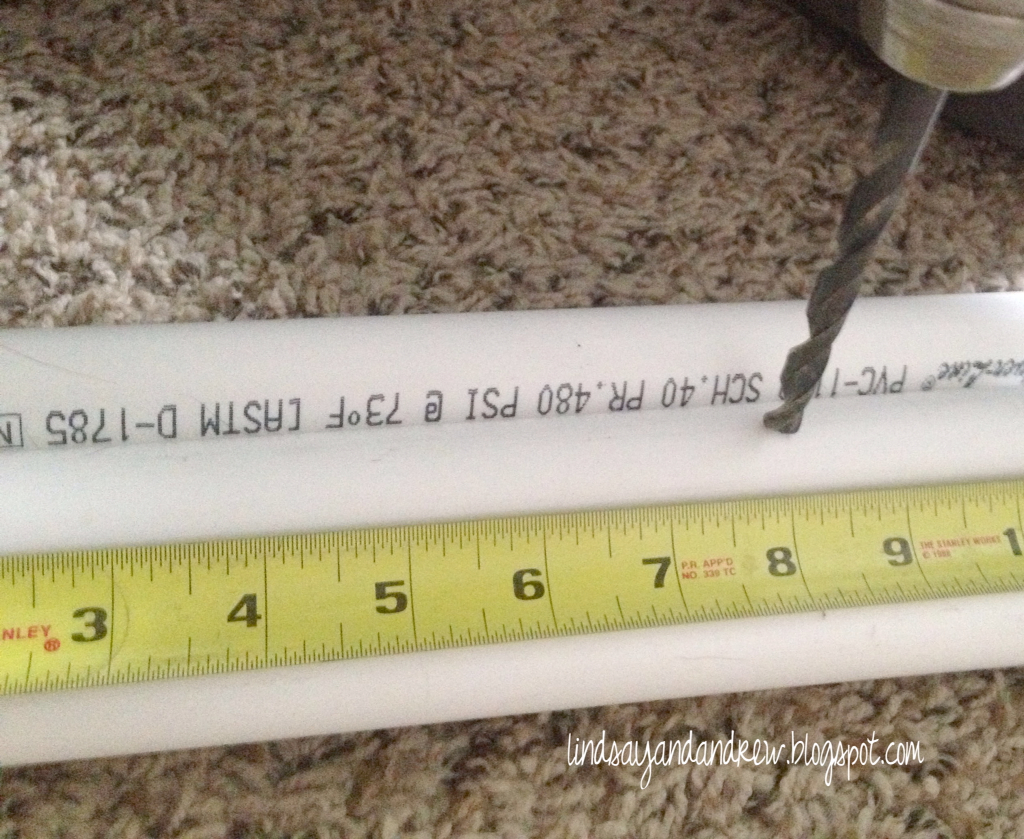
* 6 -ten foot 3/4" PVC pipes (Drew called it Schedule 40 PVC, whatever that means!)... We purchased these at Lowes... Can also be purchased at Home Depot... We got the thick lining PVC so it was sturdier...
* 12 -3/4" end caps
* 6 threaded female couplings...
* 6 threaded male couplings... (The more time I spend in hardware stores the more I realize it was designed by men.... Who else would say male and female fittings, nipples and boob lights...) I giggle every time.... Yep... 12 years old....
* PVC cement... You don't need primer because there will be no water in the PVC...
* 1/4" rope (same one I used here)... I believe I got this at Home Depot... Smile and Wave used leather... Whatever your pleasure be here...
* 3/4" ribbon from Joanne's... Enough for 17 twelve inch ties...
We also had on hand PVC cutters from Home Depot and a drill for the holes at the top of the teepee.... However I think you can ask the people at Home Depot to cut the PVC down for you... I cut them down from 10 ft to 7 ft.... Then cut the 7 foot pipes so that one end was 3 ft long and the other end was 4 ft long. I wasn't sure if I wanted a 7 foot teepee or a 6 ft so I was cutting a little at a time... I suppose you could cut the 7 ft pipes in half and be just fine!

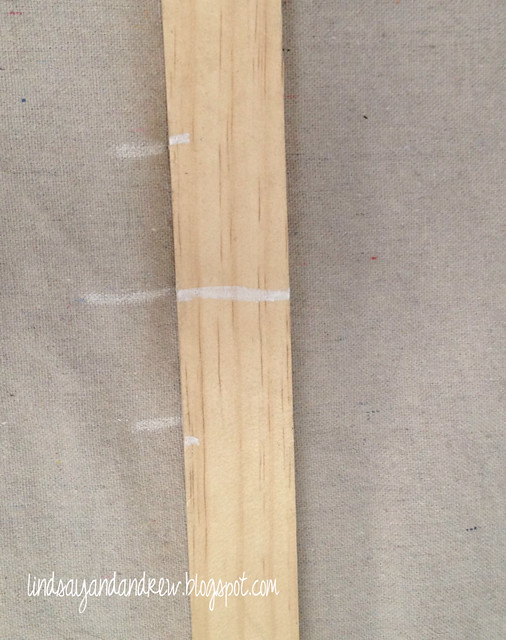
I conveniently found a square piece of wood in our garage measuring 38" wide... Fate! You could use two yardsticks taped together... Something to help make the long triangles...
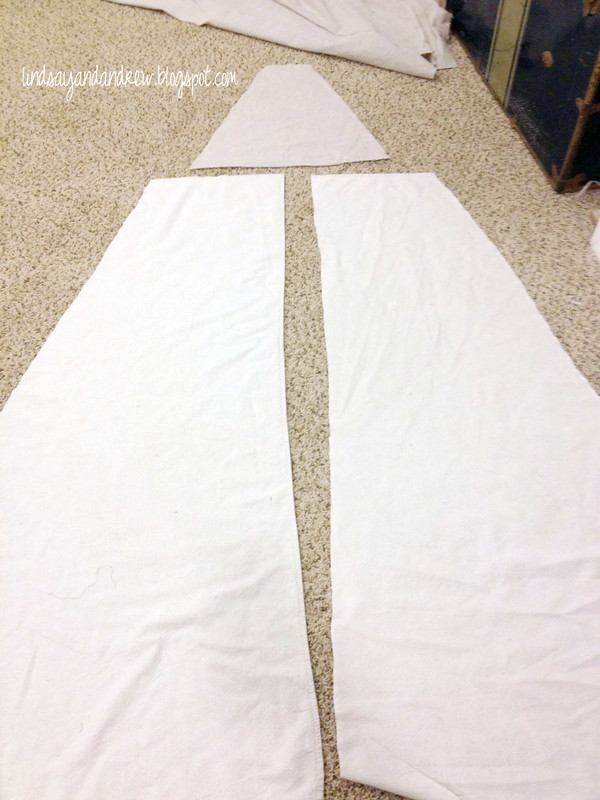
Directions say make: 5 panels 38" wide at the base and 4" at the top, 80" tall... This is where maybe you could adjust the measurements to fit all the panels on one drop cloth... Maybe 36" at the base and 4" at the top 80" tall...
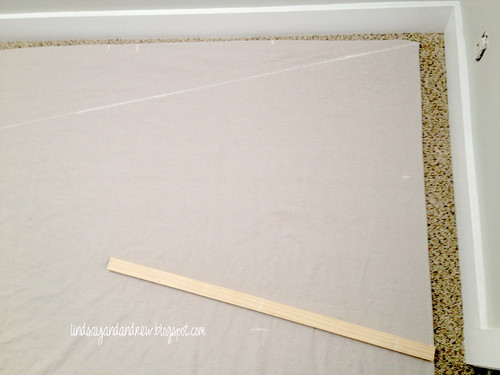
I measured the bottom of the drop cloth 38" and marked it with chalk... I did this in the corner of the room to help make even measurements... I also marked the center of 38".... Measure the other edge of the drop cloth on the left of the picture up 80" laid my wood across at 80" so it was parallel to the bottom of th drop cloth where I made my first measurements and marked where the center of the 38" was...then added 2" on either side of the mark for 4" top...
(Ignore the little marks at the top of the picture below... I was trying to figure out how to get all the panels out of one drop cloth... Never quite got it...) Then I used my piece of wood and set it in the corner and eyeballed it to the edge of the top 4".... This is where two yard sticks would have been handy... With a little luck this worked out perfect for me. I set it down and drew a line, then moved the wood halfway up so about a foot was still on the chalk line...
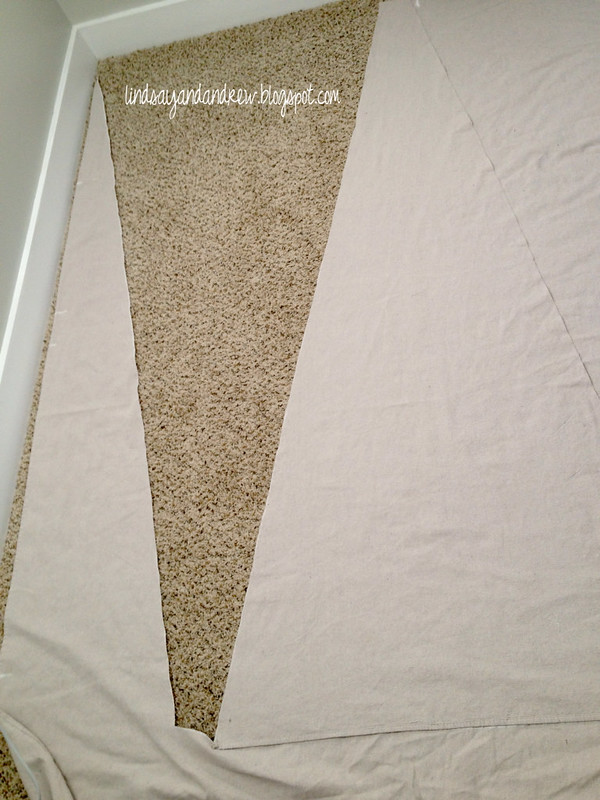
Then I cut the chalk lines out... I used that first panel as my template for the rest....remember to only use the first one... If you switch panels they have a tendency to grow over time... I unversed the panels every time, top to bottom and bottom to top to fit more in...
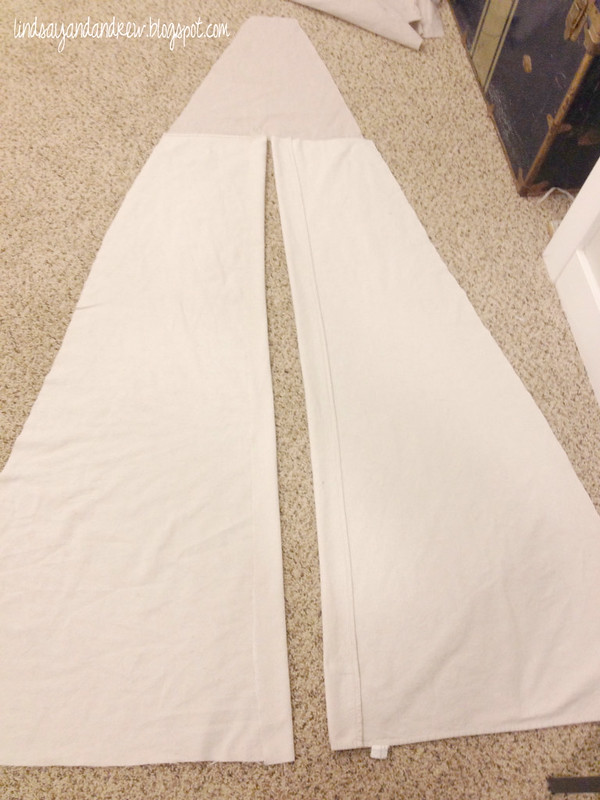
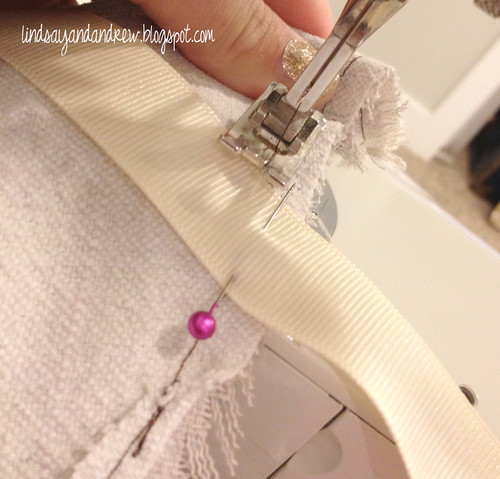
Then I pinned and sewed the panels together.... Laying one on top of another as you can see below...

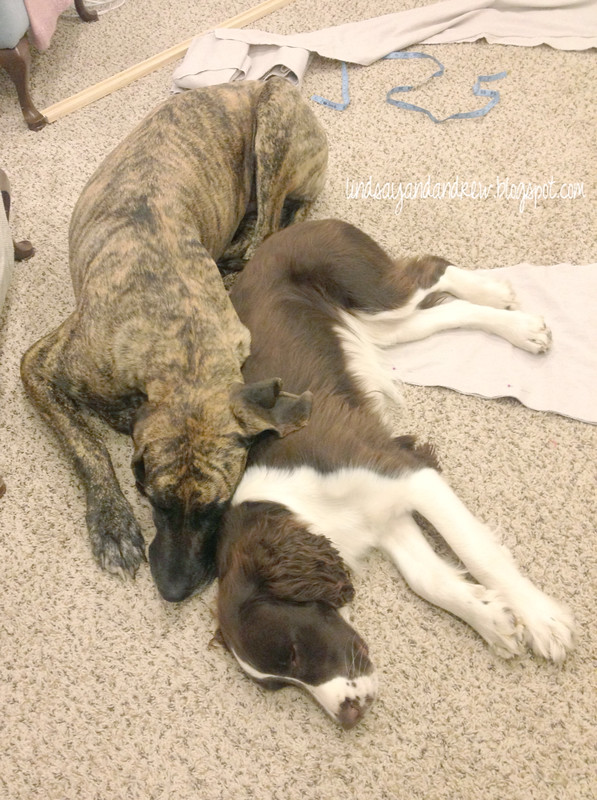
Sewed the side that was pinned together.... The pups wrestled...

I sewed two together and two more together, opened them and laid them face together and pinned one side, sewed that together, opened it and sewed the remaining panel on....
Now for the door... I cut the top triangle out of the original drop cloth and the door panels out of a new drop cloth... The top triangle measurements were 5" top x 19" tall x 21" base... The door panels were 12.5" top, 33" base and a straight edge that measures 58"... I used the corner of the new drop cloth for a straight 33" bottom and straight 58" edge... Cut this out and used it as the template for the next panel... These could be smaller too... I probably would have done an 11" top and 31" base... Line it all up straight sides together, then hem the straight sides in... I had to turn the ends in 1.5" because the panels were so big... Then sew the upper triangle to the door panels making sure the doors hang straight... Then sew the door to the rest of the teepee...
Then with an inside out teepee I folded the top over...
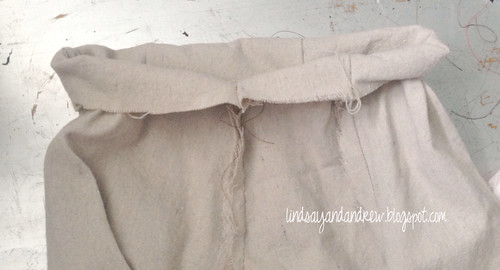
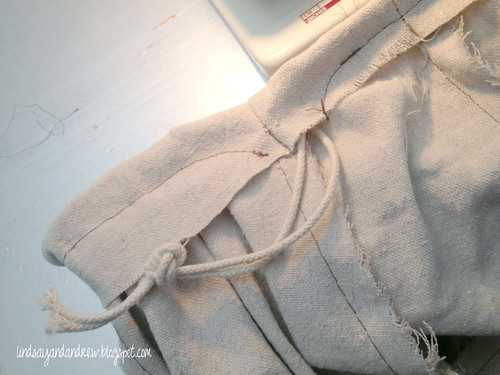
Ran my rope through amd pinned it in, sewed underneath it...
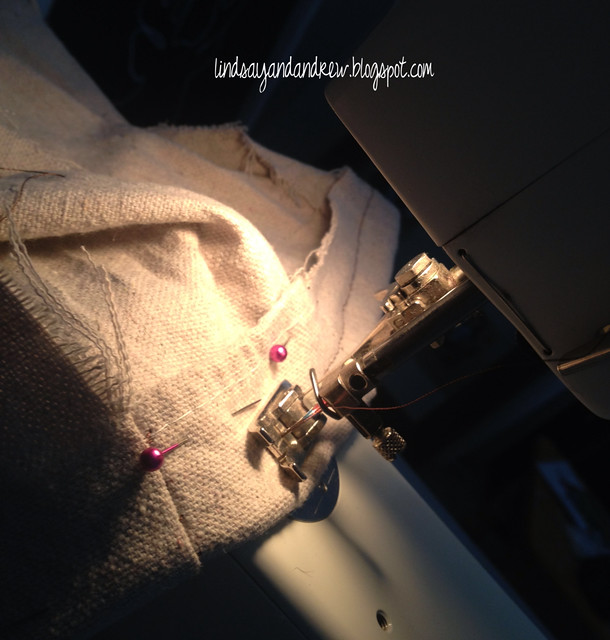
Ended it like below... This helps cinch the top tight... The directions said to do elastic but the rope works just as well and can be clinches as tight as need be....
Phew.... Did you follow that? Now for the posts...

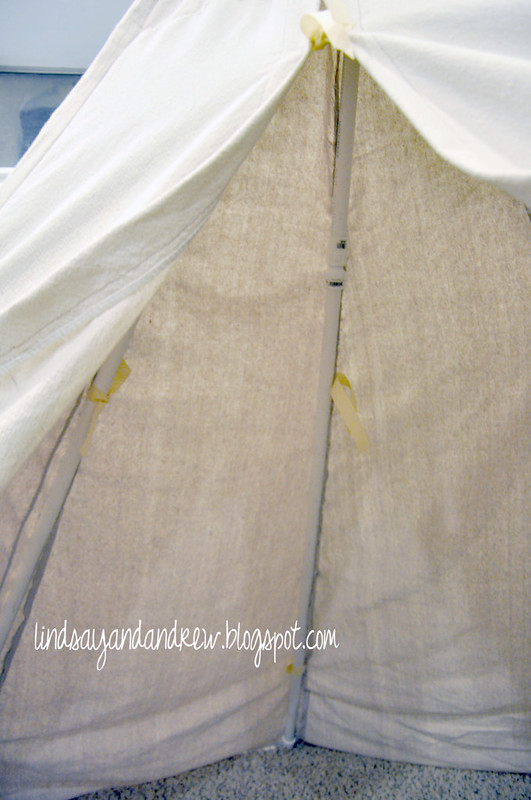
Like I said before I cut the 10 ft PVC down to 7 feet, the cut again at 4 ft... Leaving a 4 ft piece and a 3ft piece... PVC attracted every single piece of dog hair.... It was driving me crazy... So I apologize for the hair in the pics... It was a nightmare...

Took the male and female fittings...

And the PVC cement glue.. Swabbed the glue on with the swab that is on the glue cap...

And fit them on... I tried to put all the male ends on the 4ft sections and female on the 3 ft.... I messed up and it really doesn't matter...


A close up.... Now for the ribbon ties... On the door I did a 6" piece 6 " down on either side of the door... Make sure the two pieces line up on each panel... Then repeat in the middle and bottom of the door... I also did 6" pieces on the outside to hold the door up on open...
I set the teepee up and pinned the ribbons two on each post all around the teepee...
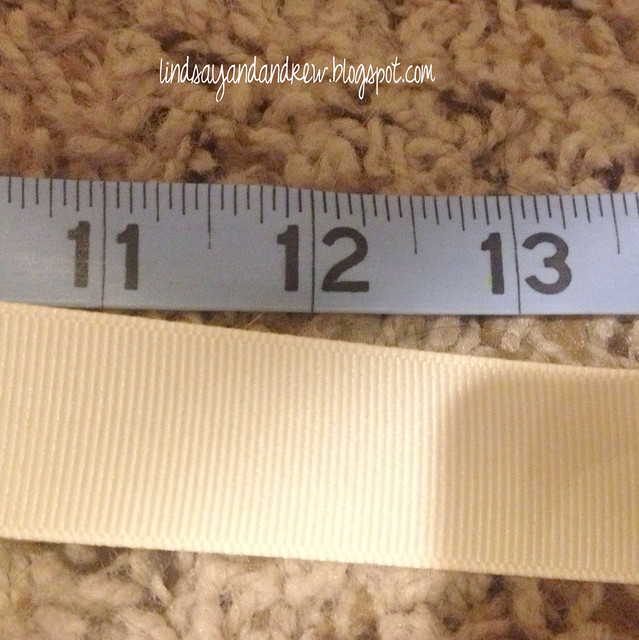
Each inside ribbon was 12" long sewn in the middle of the ribbon...
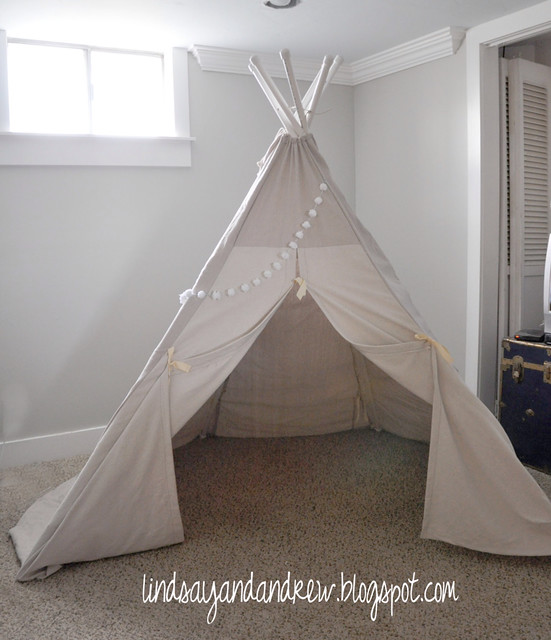
And done!

The pups were crazy about it! Cleo the 160 lb Great Dane has plenty of room....
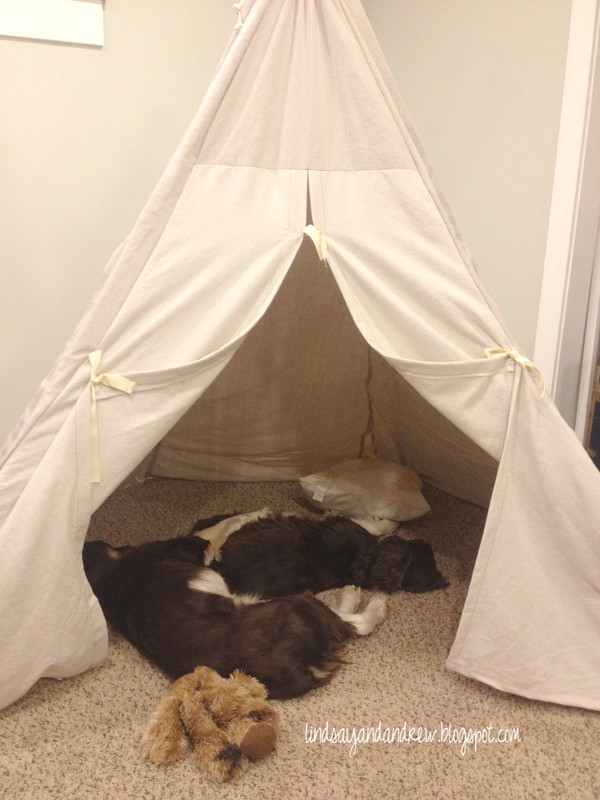
Two snuggling Springer Spaniels.... Do you see Mac's arm around Polly... Can you stand it?

Close up of the ribbon ties...
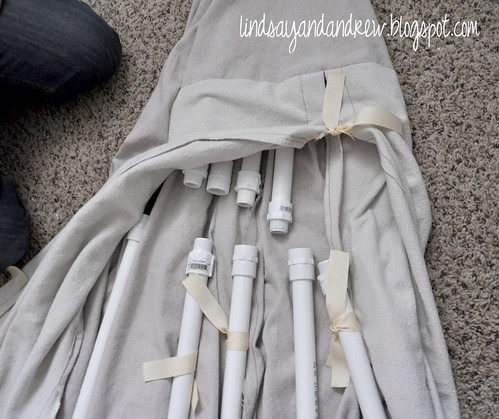
Now to break it down... Gather the poles together, lay down the teepee with the door open unscrew the fittings... Make sure the ribbon ties are tied... Pull the pipes apart, close the teepee and fold...
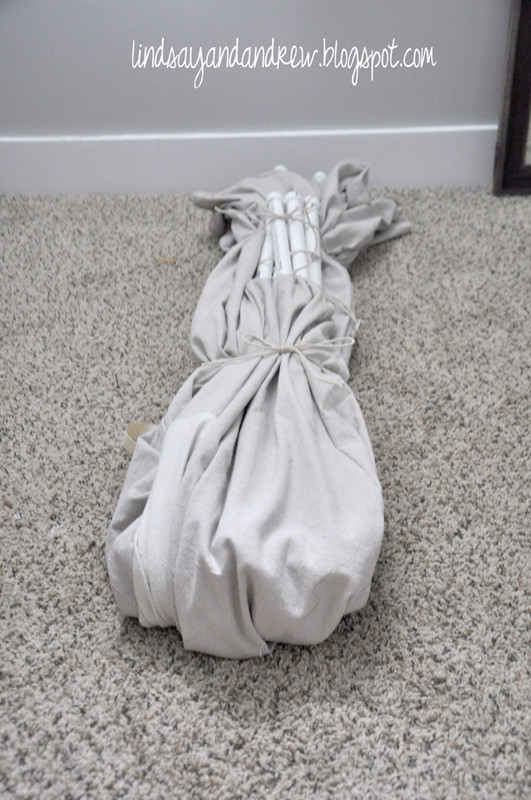
I tied it with leftover rope... I might go get a thick ribbon...
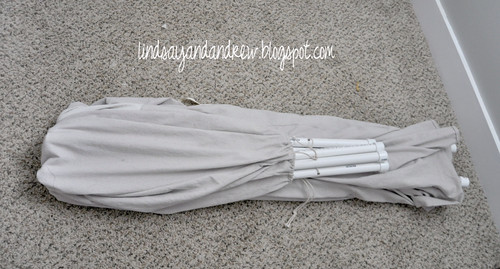
Ta-da! Collapsible Teepee!

Looks oh so charming with my felt campfire and roasting 's'mores!


SO cute. Weston would love that! My dad made us one when we were little and I camped in it with my brothers all the time. Presh!
ReplyDeleteThat Paul... What a champ! Did he save it to pass down to you? That would be amazing!
Deletethat is a GREAT toy!! wow!!
ReplyDeleteThanks Kam! Get your blog up mkay
DeleteBEST. NANNY. EVER. Those Morgans never knew how lucky they were when I quit.
ReplyDeleteI never knew how lucky I was when you quit! Hana thanks Alex.... You can come play in it before its delivered!
DeleteBeing almost full-blood Native American, I don't think my ancestors tried to get the deer hides on their tipi to match. The off color door adds character! It is absolutely adorable.
ReplyDeleteThank you! And fret point! I should have researched how to spell tipi! Thanks for your comment!
DeleteI think my grandkids would LOVE this. Going to save this for sure
ReplyDeleteJust finished mine!! This is a great tutorial! It's for my niece and nephew! They will LOVE it! I'm having some trouble setting it up however. Looks like that might be a two person job? Otherwise it's great!
ReplyDeleteHooray!!! I'm so glad to hear! Yes set up can be a pain! After many times setting it up I'm getting more proficient with a one man set up! Good luck!
DeleteHey there! I love this PVC tent design! Just wanted you to know I've plugged you in my resource center blog. You can check it out here: http://www.pvcfittingsonline.com/resource-center/diy-reading-tents/
ReplyDeleteHi - just had a question regarding the door panel. Is each side 33" wide at the base, or 33" total? (16.5" each) Thanks for any help!!
ReplyDeleteCan't wait to make this for my kiddos who have been wanting a tipi. I'm gonna let them draw on it with fabric markers. They are going to love it.
ReplyDeleteOh great, How much did it cost? I am planning to buy some materials in hardware store. I want to build my own but different style.
ReplyDeleteNice ten made out of PVC Pipes.
ReplyDelete