Have ugly linoleum floors? Want a cheap fix?
Drew and I worked together on this quick facelift... This was originally a pink kitchen.... You can see peeks of the original pink on the cabinets where the pulls we're removed. The linoleum was a pinkish white, and the whole place was ready for a fresh coat of new. Drew started off by sanding, prepping and painting the cabinets and walls. Then he sanded and bondo-ed the floors. Sanding was to clean and scuff the floor enough to get the gloss off the linoleum.
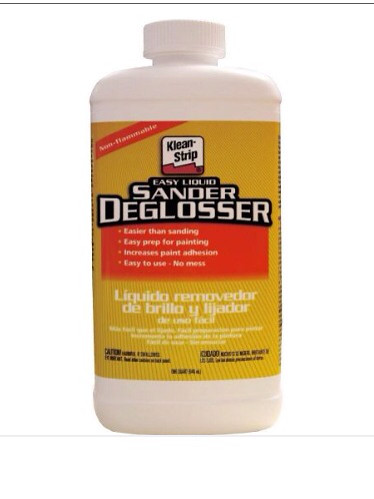
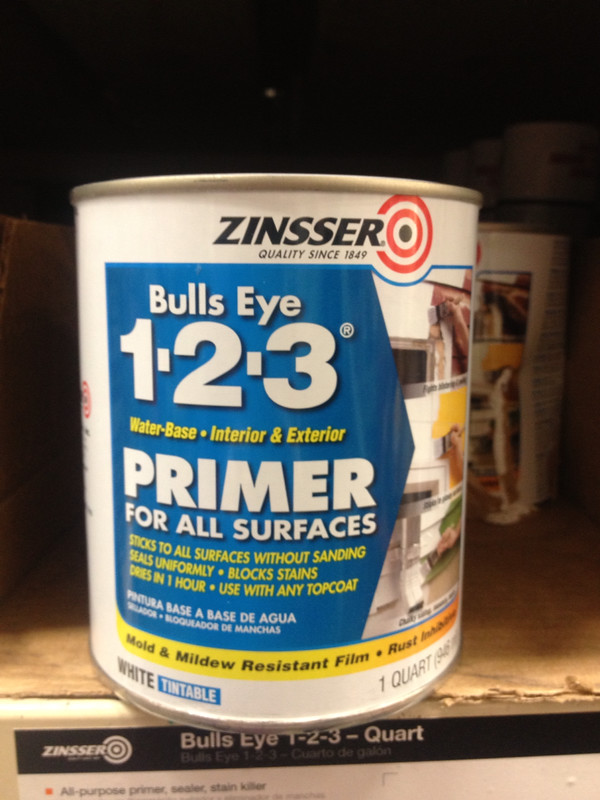
This is all to make sure the primer sticks. With the flooring being linoleum it has more give and movement and you don't want the paint to crack or separate from the surface you painted. Next up is our primer. I searched high and low to make sure we were using the right products to get a super durable long lasting final product. Don't be fooled by EVERYONE who will tell you that this isn't do able. There are a great many sources online who will tell you they have done it, and it LASTS! One of these resources (that now I can't find) directed us to Zinsser all surface primer. This stuff
Rustoleum 1 Gallon Bulls Eye Zero Primer 249020 - Pack of 2 (Google Affiliate Ad) was terrific, and as they claim sticks to all surfaces. As it also says, it was dry in an hour so we went ahead with the color.
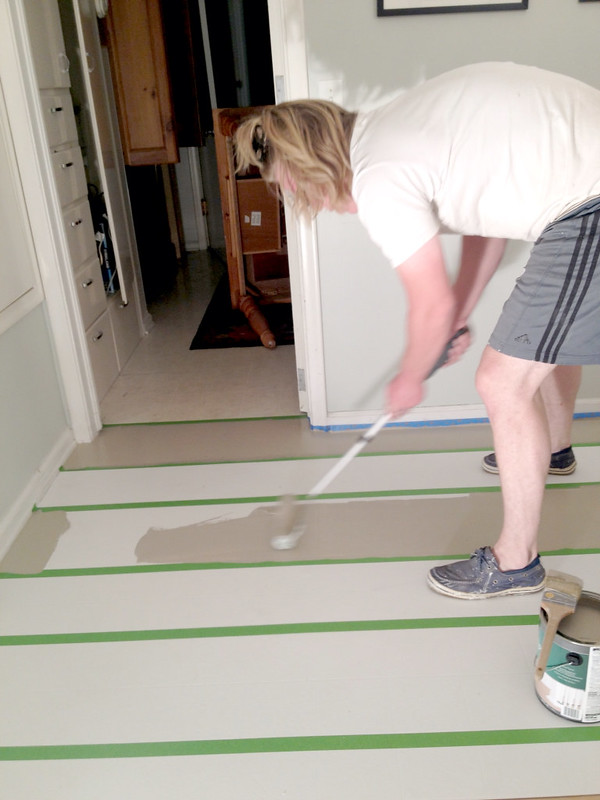
Then we went with Behr's Porch and Patio floor paint, in two different colors. The first was just their plain bright white. No tint. The second color was Benjamin Moore's Shenandoah Taupe. As you will see below.
We painted the entire floor with the white, two coats and let it cure for 3 days. 24 hours with no contact and 2 days with light use. After three days you can give it a good scrub. Then came the amazing part, the stripes thanks to Frog Tape. Shurtech 483381 Green Frog Multisurface Masking Tape .94 in. x 45 Yards (Google Affiliate Ad)
Drew brought out the halogen lights and followed the original lines of the linoleum. He is incredible patient and precise. Two very important traits. We had some hiccups with the taping and had to pull up the tape and reapply it... I was certain the Frog Tape would run.... I was truly blown away by this product. The commercials do not lie... Even pulling up and reapplying several times we had no runs. If I hadn't seen it myself I would not have believed it. That edge lock system is the real deal. FrogTape I am a convert!
I chose Bemjamin Moore's Gray Owl for the walls...
And Benjamin Moore's Shenandoah Taupe for the floors. Just look at them together? M.F.E.O.... Made For Each Other (thank you Sleepless in Seattle)...
Yep.... Drewpy is using one of those hair claw clips.... I wanted him to go Liz Lemmon 30 Rock style and get him a Chip Clip.... How amazing would that have been? Adding those to our grocery list... Drewpy used a fine roller and put two coats of Shenandoah Taupe on. Then pulled the paint. It was a divine moment I tell ya! No runs!
We used a minwax finish...Minwax .50 Pint Semi Gloss Polycrylic Protective Finishes 24444 (Google Affiliate Ad).... Kind of like the one above but the one we used was a HIGH TRAFFIC CRYSTAL CLEAR FINISH. All of those words are important. Especially the crystal clear finish. On this house, where we painted the wood floor, the painters used a clear coat that was anything but clear. It turned the entire floor a yellow brown. So the crystal clear finish is necessary.
I had the best intentions of going back over and taking better finished pictures but never got around to it. So phone pics will have to do! The floor turned out amazing!
I chose to have the stripes run in this direction to widen the look of the room from the front door to the sink.
The colors together are perfect. The paint is holding up perfectly and with the high gloss clear coat are very easy to clean. What more can you ask for in a cheap quick update!?


It looks so amazing! You guys did a fantastic job!
ReplyDeleteGorgeous! Great fix.
ReplyDeleteThank you!
DeleteSo, I have to ask...since it has been a few weeks, do you still like it? Is it holding up? I would LOVE to do this but have been super scared that it would just chip after a week or so.
ReplyDeleteHi! Thanks for stopping by! It has now been 6 weeks since we painted the floor. And it looks better than ever! It has held up to large family gatherings. And plates crashing on the ground and furniture being moved back in! Prepping the surface is key! Letting it cure undisturbed and using the proper materials you should be good to go! Good luck! I would love to know if you go ahead with your project. Email me if you have any specific questions and we'll see if we can help!
DeleteGreat transformation!!
ReplyDeleteI have vinyl floors--ugly, ugly faux stone--rental property.. You have no idea-wait, yes you do--how many times I threaten to paint mine and take the hit paying for more ugly vinyl replacement after I move out.
Great tip using patio paint! You've given me more fuel to the fire, here...
Let me ask...was this less costly than replacing it with flooring? There are actually vinyl "planks" that look like real wood, that I wish landlords would use.
Cheers!
I might have to check my numbers again, but I believe for supplies we spent roughly $120 on a 25x12 (roughly) room. We had left over of almost everything so I can't give you a square foot price. I will say, we put down a like you are talking about and got it CHEAP! Deeply discounted at $0.49. It looked great, and we were happy with it except for when we took it up. In the cracks and underneath I didn't realize how much crud could get in the tiny almost invisible creases. With the paint it is one solid surface that a quick sweep of the mop and your done!
DeleteOh, and eww...yeah, did not realize the cracks in between the vinyl strips would collect dirt and moisture. Great point, and your floor was well worth the effort and minimal cost.
DeleteHahaha Oh... Eww.... Was exactly my reaction when we took it up!
DeleteI'm gonna talk of thats on my french blog! I think is a good idea! Normaly we see that on a wall ! Its a very good idea on a floor!
ReplyDeleteGreat job! Sorry for my english i'm from Québec!
Jessica!
XO
http://departementdedecoration.blogspot.ca/
Thank you! And loved the feature thanks!
DeleteI too painted our kitchen (and bathroom) floor. Held up great for years! (We sold our house last year and it was still looking fabulous!) I also loved that it was a quick fix and the solid surface was super easy to clean. I did originally seal the paint but because the sealer yellowed it (bummer), I ended up just repainting the entire floor...with regular wall paint! It held up amazingly! Maybe the primer and sealer underneath helped with the long term durability... Sometimes if I wanted a shinier look, I'd use an acrylic floor wax.
ReplyDeleteWhat I loved was finally getting rid of that horrible 1970's green flooring and making it a much lighter shade of off-white. Paint: It's the world's best and cheapest tool sometime ;-)
Thanks for sharing your experience and tips! I was super worried about the clear coat yellowing! But this high traffic crystal clear coat did as it advertised! It has tried super sturdy and super clear! I highly recommend it!
Deletedo you think a dark color would hold up just as well? thinking of redoing my bathroom but would like a contrast with the lighter walls and fixtures.
ReplyDeletedo you think a darker colour would hold up just as well? i am thinking of redoing my bathroom floor but would like more contrast with the lighter walls and fixtures.
ReplyDeletedo you think a dark color would hold up just as well? thinking of redoing my bathroom but would like a contrast with the lighter walls and fixtures.
ReplyDeleteYes! The paint can be tinted to any color. As long as you prep and seal correctly you should be just fine!
DeleteIf you want to save some money you can surely paint your floor to give it a fresh look, a lot of people are doing this nowadays, you can also make some really nice designs on the floor using bold colors.
ReplyDeleteWow! It looks fantastic. I wish I knew how to do all that! thanks for sharing.I am your newest follower. Visiting from SNS linky. Hope you can visit me sometime.
ReplyDeletemichelangelo marble
I find many useful things herewithCheapest Wood Flooring
ReplyDeleteI salute you for doing some renovations. Makes me think that I needed one for my porch too! And the wood tiles are really perfect for my porch. It brings out the "nature" look in a place plus the plants they are all lovely!
ReplyDeletePatio flooring
great basic description of the work & how to do it. thanks a lot!
ReplyDeleteI am looking to do this in our new home. We have moved in to a house that came with my husbands job. So we aren't renting but we don't own it, they are allowing us to work on the home as much as we want but the kitchen has linoleum tiles on top of asbestus floors. So I am not going to attempt to rip them up. Painting is our only option. I saw that you said 24 hours with no contact. Our kitchen is kind of the center of our home, meaning we wouldn't have a way to enter our bedroom or bathroom if we couldn't walk on the floors. I was just wondering if you could shed more light on that aspect of the project for me.
ReplyDeleteNice article and great knowledge about michealangelo marble. I love this story and enjoy with your words!
ReplyDeleteThis show cased products are amazing and gives nice information.These are very much useful for linoleum floorings.
ReplyDeletefloor paint
This show cased items are astonishing and gives decent information.these are really helpful for linoleum floorings.
ReplyDeletefloor paint
To remove paint on linoleum flooring once it's dried, the easiest solution may be to cut an entire new square for the section which has the paint on it. This is clean, precise and easy, plus it won't cause more damage to your flooring like other repair methods might.
ReplyDeleteArticle Source: http://EzineArticles.com/7988616
Hi Lindsay!
ReplyDeleteI came across your post on Pinterest and actually used it to help me paint my laundry room floors. I'm at the clear coat stage and just wanted to check in and see how the clear coat polyurethane held up? It says its primarily for wood floors - did you have any problems?
Thanks!
Cheryl
Thank you, Lindsay and Drew! I am just not ready to replace the linoleum floor in my bathroom, and so I appreciate this.
ReplyDeleteIt's a small space, and it's a bathroom, so I plan to add blocks (maybe sponged somehow) to the final surface before protecting it. I'll upload a pic when I'm done.
Frankly, I hope it lasts a couple of years ... but if not ... nothing lost!
Again, thank you.
Looks awesome! Wondering how your floor is holding up now that it has been over a year? Looking to do this and curious the longevity since there are so many methods online I am seeing! Thanks!!
ReplyDeleteHi! Thanks for asking. The floors have held up really well. We do have two spots where moving in a fridge and a repair main for the dishwasher dug into the linoleum. But hardwood/tile or linoleum wouldn't have faired any better under that pressure! So yes other than that looks just as good with no other maintenance then wiping it clean! Good luck!
DeleteJust confirming -- this was actual linoleum, not vinyl? I'm looking at doing this for my daughter's room and want to make sure I don't mix up my preparations! I only have a few days where she'll be at grandmother's house for her spring vacation... Thanks for letting me triple-check.
ReplyDeleteYes! It was linoleum. From what I read you can paint linoleum and vinyl the same way. It's just a matter of prep, really making sure the floors don't have any glossy sheen before you paint. Good luck!
DeleteI didn't know that vinyl flooring could be painted effectively. I just assumed that the floor would need to be replaced when a new look was desired. This presents me with a few options that may save me some money going forward. Now I just need to convince my wife to go with a paint job instead of a new floor install.
ReplyDeletehttp://apexfloortile.com/chicago-il-vinyl-flooring-congoleum-linoleum-flooring.htm
My mom hates her linoleum floors, I bet she would love the way this floor turned out. I'm really impressed with the before and after pictures. The stripes add a fun design to the kitchen but it's not too crazy and not too busy. I will for sure tell my mom about this and I can't wait to see the results. http://www.rcleescarpetonefredericksburg.com/
ReplyDeleteYou can paint vinyl flooring?! I had no idea that you could do that! That makes me want to go out and buy supplies to do this to my floor!
ReplyDeleteSara Welsh | http://www.rcleescarpetonefredericksburg.com/
Hi There! Just curious to see how your floors have held up? I'm considering painting our linoleum kitchen and hall floors, but am worried about the durability. I see you used a high traffic finish...how did it work out?? Thanks!
ReplyDeleteYour post is really good providing good information.. I liked it and enjoyed reading it. Keep sharing such important posts.
ReplyDeletePolyaspartic coatings
I never realized that you could paint vinyl flooring. I know my wife has wanted new floors in our kitchen for a while now, but we haven't been able to afford it. I will have to show her this and see what she thinks. It is definitely a cheaper alternative. I guess I will have to go buy the supplies and get started on this project for her. http://apexfloortile.com/chicago-il-vinyl-flooring-congoleum-linoleum-flooring.htm
ReplyDeleteExcellent painting!!
ReplyDeleteI'm currently in the middle of a bathroom remodel and lets just say its not going as planned: http://thenewdaybringshope.blogspot.com/2015/01/bathroom-remodel-in-progress.html
ReplyDeleteI have been considering painting my linoleum in my laundry room but was wondering how it would look. I had in mind to do EXACTLY what you have done and its great seeing your finished product. Now I'm considering doing the kitchen and laundry room (they currently have the same floor and are right beside each other).