


I walked through part of the trim work a while ago...
Just some pictures to refresh the process...
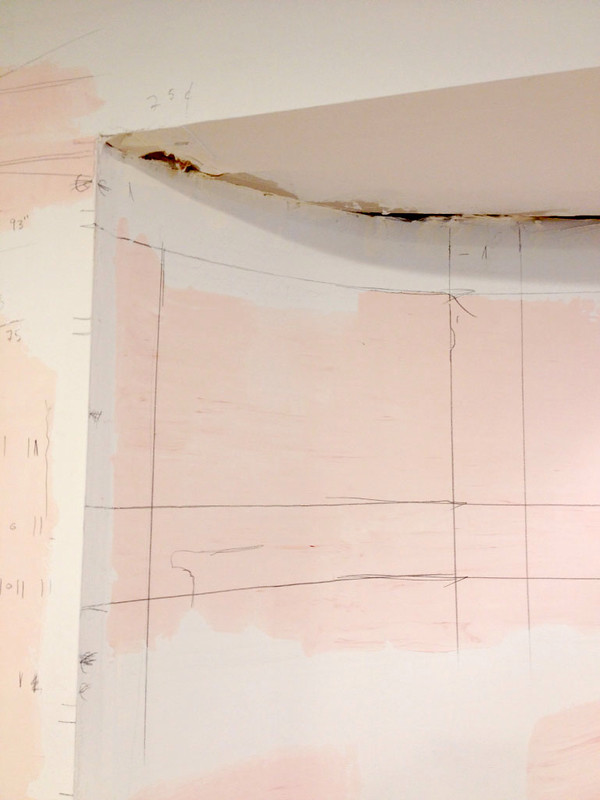
After framing, Sheetrock and square trim.
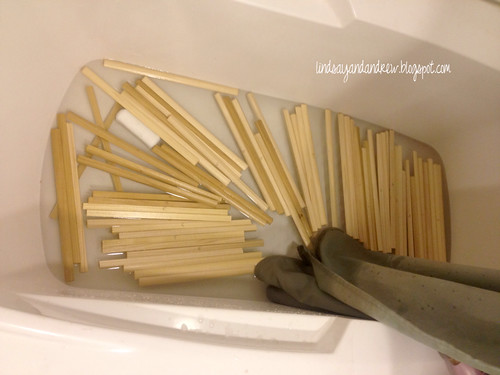
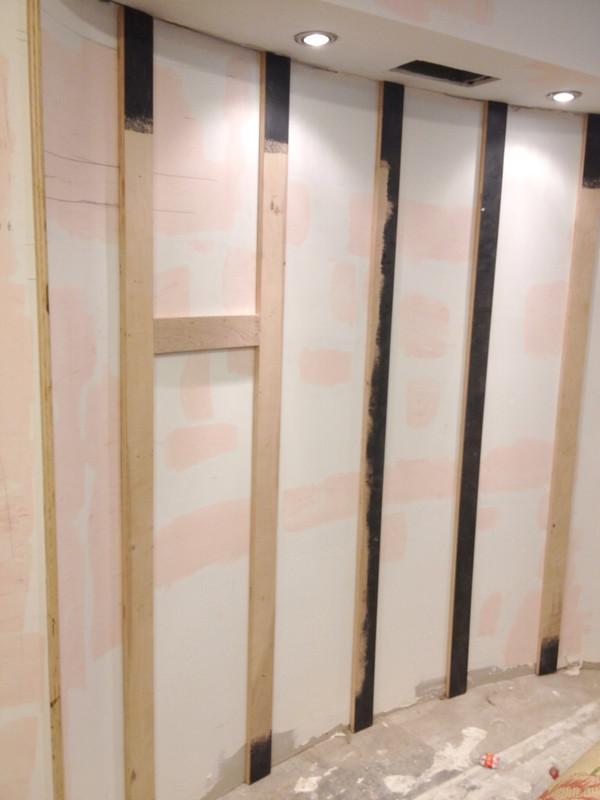
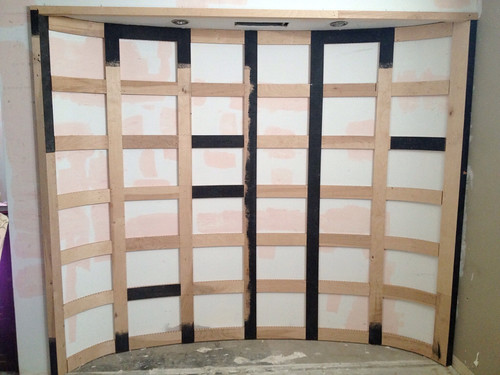
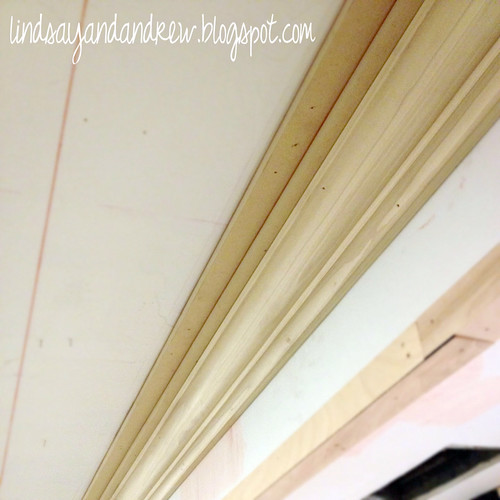
We took quarter round trim... We cut it all to size and soaked it in the tub. This was to help the quarter round curve... In the edges with the most curve we had to use exterior plastic quarter round trim... Drew installed all the horizontal pieces of 1/4 round first. Then measured the vertical to the edge and coped the vertical pieces around the horizontal.

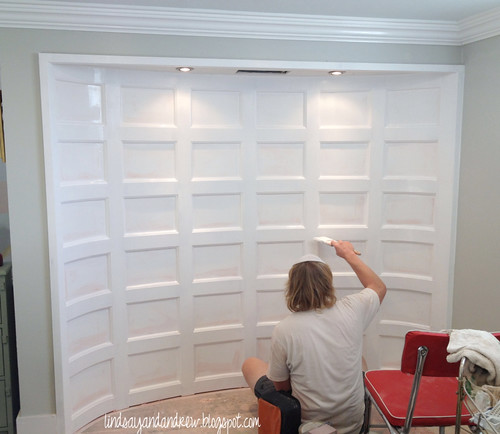
Then came my contribution... Prep work!
To prep trim to paint this is the order we follow...
1. We use Crawford's putty and take a ball of it and press it with your thumb into the nail hole. With a thin putty knife slice in between the putty and the wood with your thumb still in the putty.
2. Caulk all the lines and edges.
3. Sand
4. Prime everything
5. Spackling, Drew's spackle of choice is 3M Bondo Glazing and Spot Putty that you can get at Home Depot. With a putty knife fill in all the dips and cracks.
5. Sand
6. Paint... The bondo glazing is redd, but it does not have to be primed because it takes paint at the same consistency as the primed surfaces will. Always always always two coats of paint...
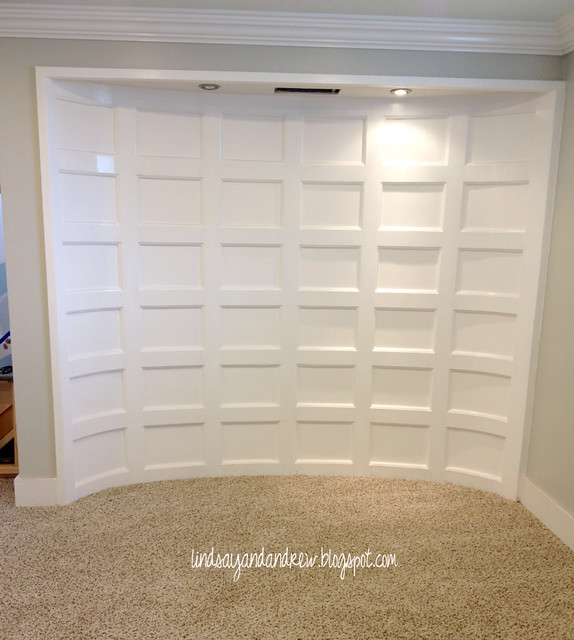
Painting... We did high gloss on the trim and flat on the walls... We got two recessed can lights from ikea... The come in a pack of 3 for $19.99. Steal! I can't find them on their site.... Hmm?
And then we got carpet.... And I wept....

Done!

Now we need to paint the top and get a pretty register... And that is trim!


Hi L&D!
ReplyDeleteI very like what you did!
I would like to do in my home too!
Sorry for my english i'm from Québec! I talk of you on my french blog!
http://departementdedecoration.blogspot.ca/
Jessica :)
Thank you thank you! Love the feature.... Your English blows my French away!
DeleteLinds you guys are incredible! And inspire me to want to fix up a house someday, love it.
ReplyDeleteDo it! Do it! Just try to do it before you move in! Ha!
Deletebeeyoutiful!
ReplyDeleteThanks Kam!
DeleteI'd weep too - fabulous job and what a focal point!
ReplyDeleteI have similar fabric on my mid century club chairs!
Kelly
Thank you! It's a great fabric that wears really well.... So far at least! Ha! Thanks for stopping by!
DeleteI love it Linds!!
ReplyDeleteOutstanding job! Such an improvement! Saw this on Better After :)
ReplyDeleteThank you! Thanks for stopping by!
DeleteWow! great job love the curve!!!
ReplyDeleteThank you!
DeleteAmazing! Just amazing.
ReplyDeleteIt looks great but where did you get the space for the curved wall? Was there a closet on the other side of the wall?
ReplyDeleteNope! Just took our the bookcase you see at the top. The curve is only about 12" deep. Thanks for stopping by!
DeleteJust plain *classy*!! (and creative, and cool, and ... ;) )
ReplyDeleteJust plain *classy*! (And cool, and creative, and ...) ;)
ReplyDeleteThis is amazing. Beautiful. Perfect. Love it!
ReplyDelete