
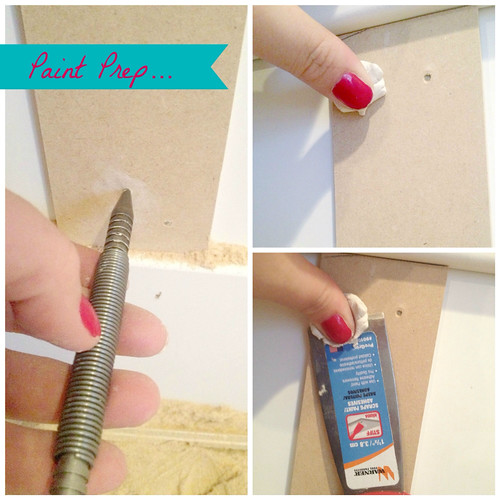
Step 1: Set the nail...
I used to hate this step until Drew brought home this spring loaded nail set from Benjamin Moore (the link goes to Woodcraft)... Using the nail set and hammer is so for the 'Harry Homeowner'... All you do is put one end on the nail, pull the back of the nail set and let go... Awesome! I even have a video on my VineApp...
Step 2: Scrape over the nail hole...
Then scrape over every nail hole to with your putty knife like the one in the lower right corner. This knocks down the blow out from the nail gun, so it's all flat.
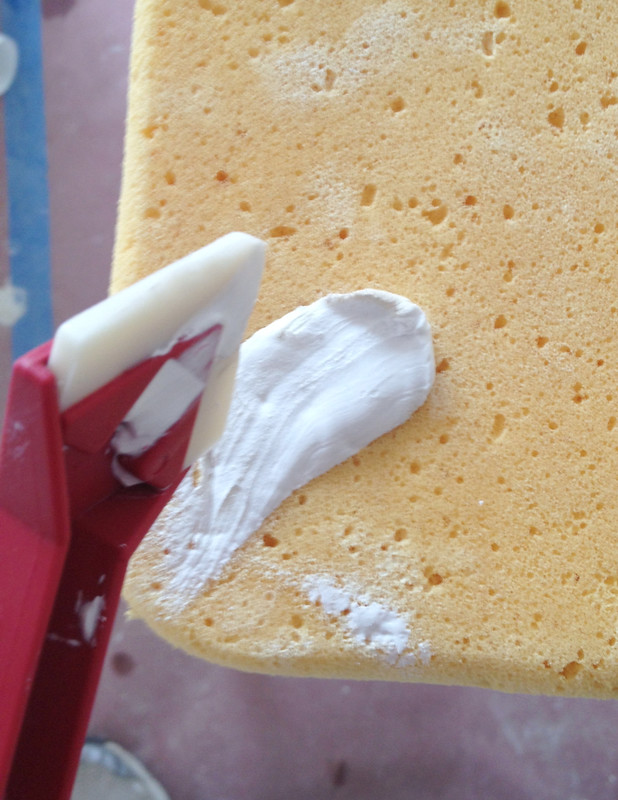
Step 3: Putty holes...
Grab a ball of putty, we like Crawford's Putty... Squish it into the nail hole... I like to squish it around to really get it in there.
Step 4: Scrape putty
Then with your thumb still depressing the putty in the hole. Shove the putty knife under the thumb across the hole. Making sure the putty is flush with the sides of the hole.

Ugh... This picture is so blurry. It's hard because all of this work was done under a halogen light... But you can see one nail hole filled, one not...
Step 5:Then you prime...
You prime before the next step because no matter how hard you clean there will still be construction dust... And sometimes the caulk etc won't stick to new material. The primer gives it a place to stick to. This will help with the caulk cracking out and expose all of the nail holes you might have missed. Then exposes the cracks or lines to spackle.
Step 6: Caulk...
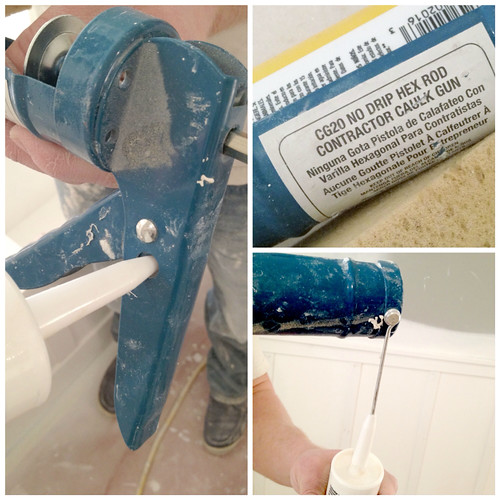
This no drip caulk gun was the best I have used. Unfortunately Drew can't remember where he bought it... We'll work on that. I like a caulk gun like this that has a hole for cutting off the tip of the caulk in the handle. Stick the tip in and squeeze the handle, then plunge in the metal skewer to help the caulk move out the end.
To caulk you need:
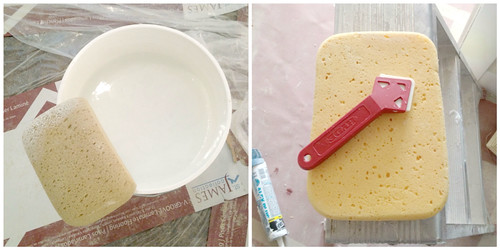
A sponge
Bucket of water
And my new favorite thing... This Hyde Caulk-Rite tool... Saved my fingers!
Step 7: Caulk

Step 8: Remove excess caulk
Step 9: Wipe down line with damp sponge
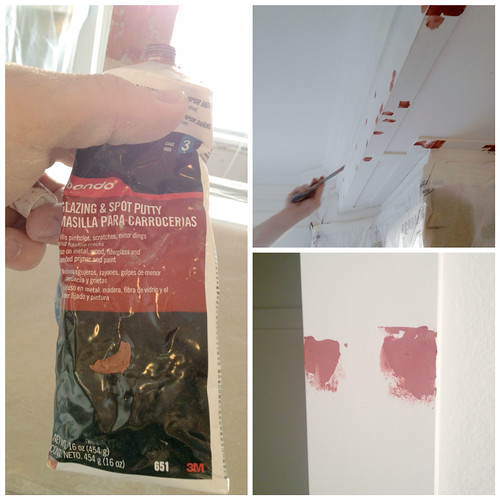
Step 10: Spackle
We use Bondo's Glazing and Spot Putty. It sands super smooth and takes paint equal to primer so you don't need to reprime. With a thin putty knife apply a THIN coat of spackle over every joint and hole you can see. If you can see it now you'll see it when it's painted.
Step 11: Sand spackle (we use a sanding sponge from Home Depot)
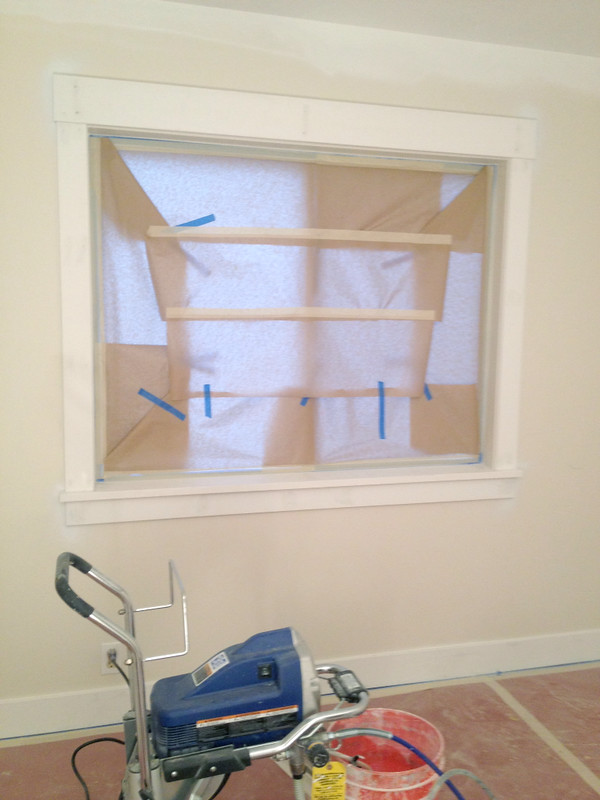
Step 12: First coat of paint
Step 13: Apply spackle to any joint or hole you can still see
Step 14: Sand
Step 15: Second coat of paint
Step 16: Touch ups... There are ALWAYS touch ups!
It's exhausting... But in the end... It's worth it!
The End... If you want to skip the steps yourself... And live in Utah... Gives us a call!


Hello sir, Are you ok?
ReplyDeleteVery true, I only started discovering this a few years ago. It can show me a best way on this idea. This is very nice post! I will bookmark this blog. Welcome to Rugstar.com.au, Australia's favorite on-line rug buying groceries in Australia: we get direct offers from the manufacturer to you! We promote an out of this world range of Australian favourite floor rug, carpet rug, by way of shopping online you'll stay on shaggy, up to date, wool, traditional and plenty of different rug designs.
Thanks for this.